I recently(ish) got a new(ish) laptop. In the main I’m very happy with it, but it had one flaw, that being that when struck on the right hand side, the space bar would either not work at all, or sometimes insert a double space. This was highly annoying and wasn’t something I was prepared to put up with. I looked into getting an OEM replacement but this was going to be nearly half what I had paid for the entire computer, so instead I looked on eBay and eventually found a C-grade part from a breaker for 40 notes; still quite pricey for what it is in my opinion, but acceptable at least. Being C-grade, it inevitably had some damage that I would need to repair. Firstly, one of the little thread insert plastic spigots had been broken off.
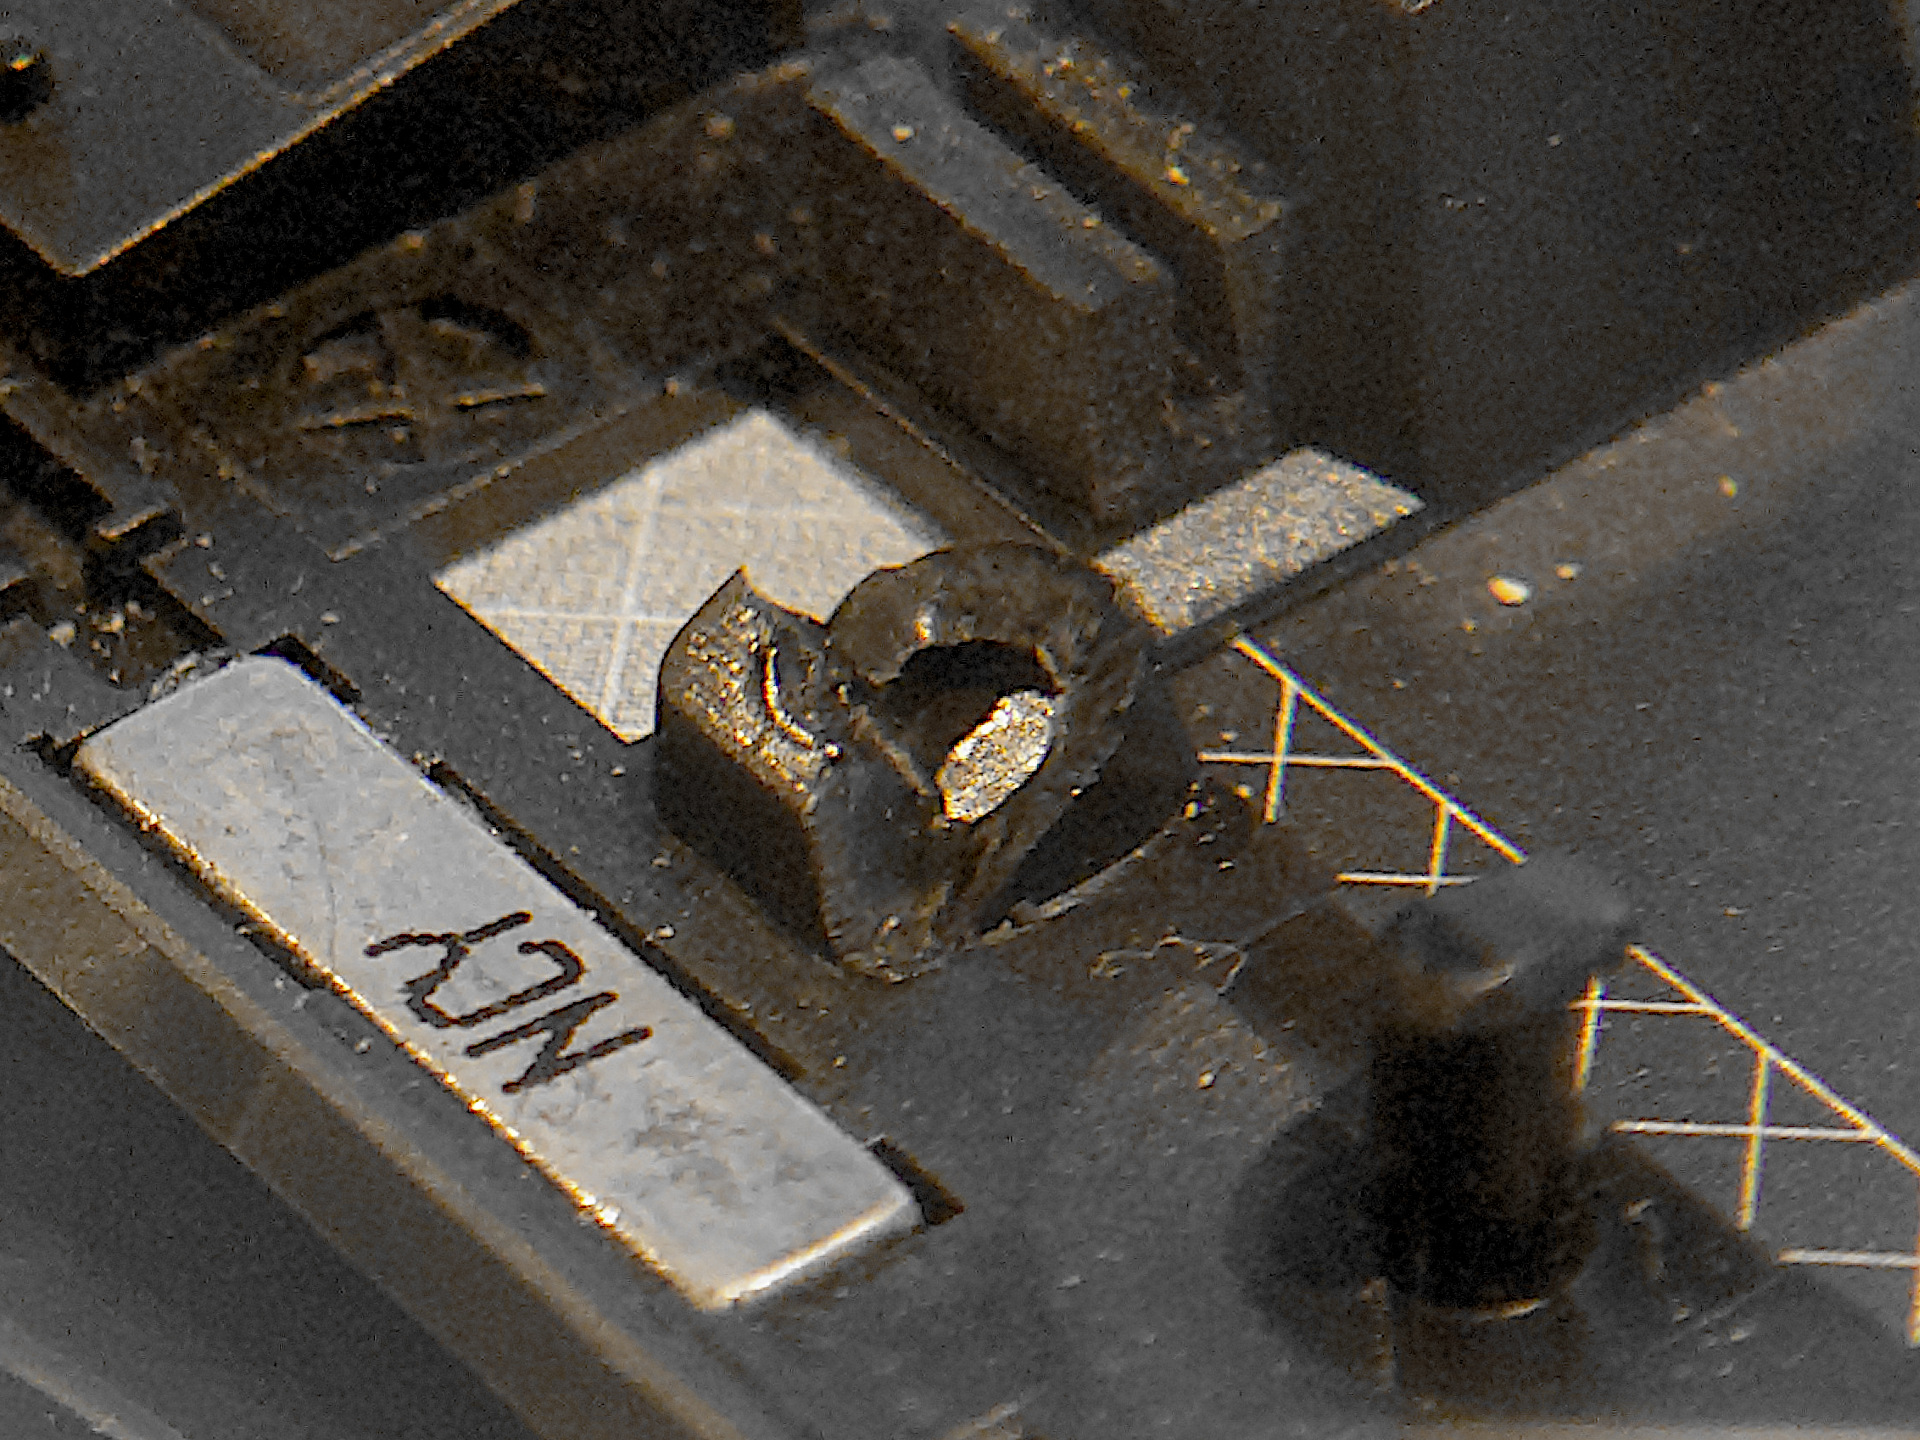
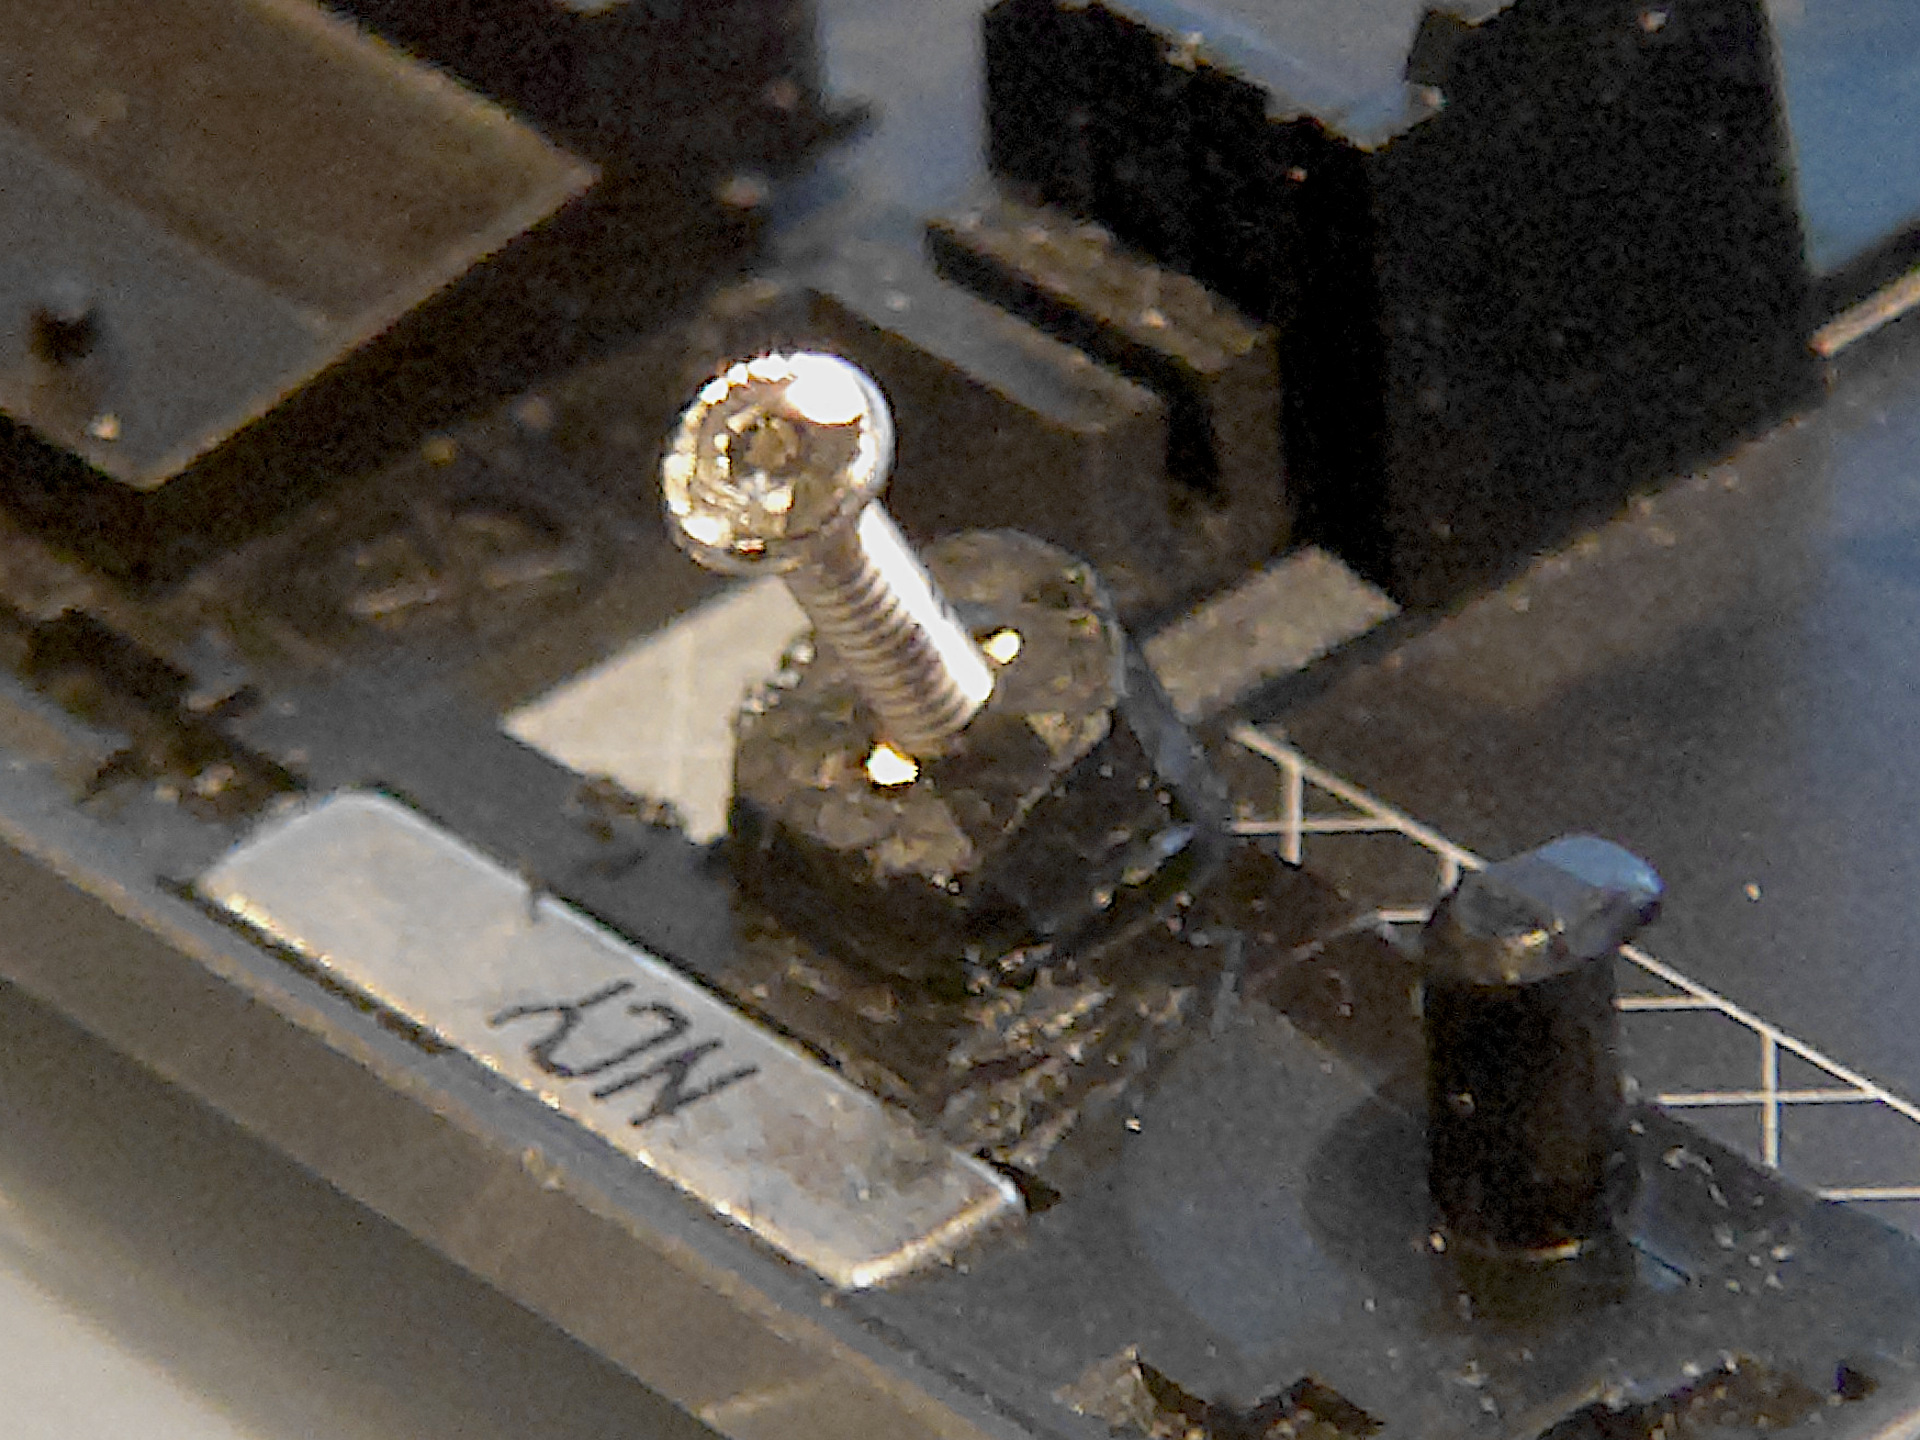
I found myself a bit of ABS (for that’s what it was) off an old tyre lever, jammed in an appropriate thread insert from my 3D printing supplies, and attacked it with a soldering iron. Incidentally the metal bar with “NCY” written on it is a magnet. This proved very annoying as the soldering iron kept getting pulled onto it. Anyway, an effective repair was made – it’s not particularly pretty, but it works.
The top of the keyboard housing had some lumps in it on the left hand side, that I knocked down with judicious use of my various car body work tools, but there was also a little concave dent around one of the vents on the side of the housing. This was so minor it really didn’t matter, if I’m completely honest, but I was in fixing mode so I decided to have a go at pulling it out. There wasn’t really an obvious way to get any leverage on it, until I remembered I had a cheap glue tab dent puller that I could perhaps use. I wasn’t going to get enough purchase with glue, so instead I deferred to the universal problem solver – the 3D printer.
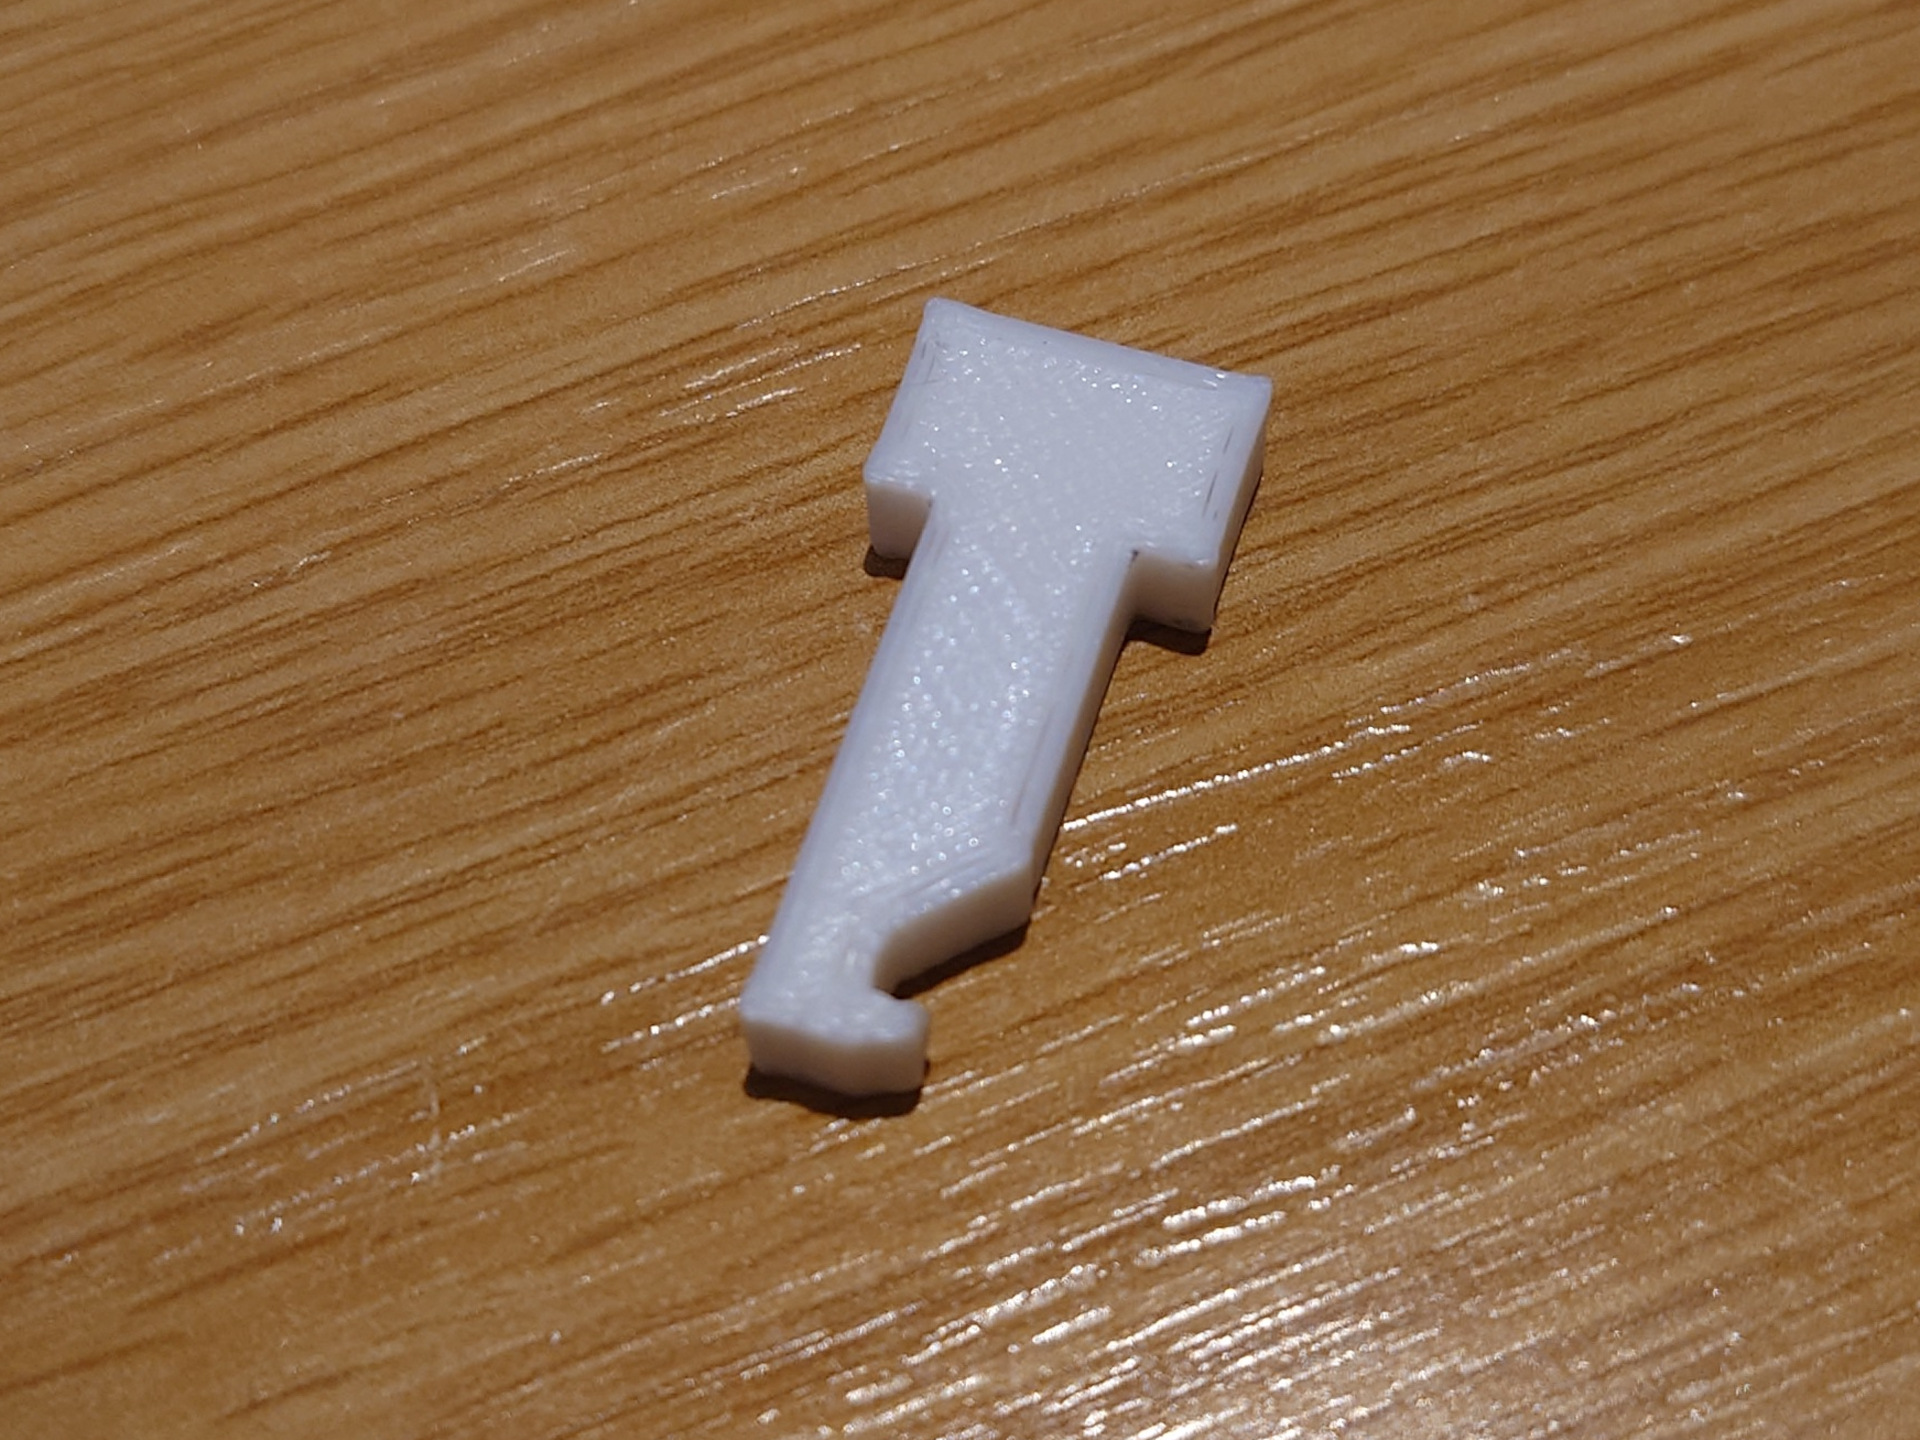
This wee thing, that took literal minutes to design and manufacture, could then be used to hook in under the dent and the puller would attach to it to do the actual job.
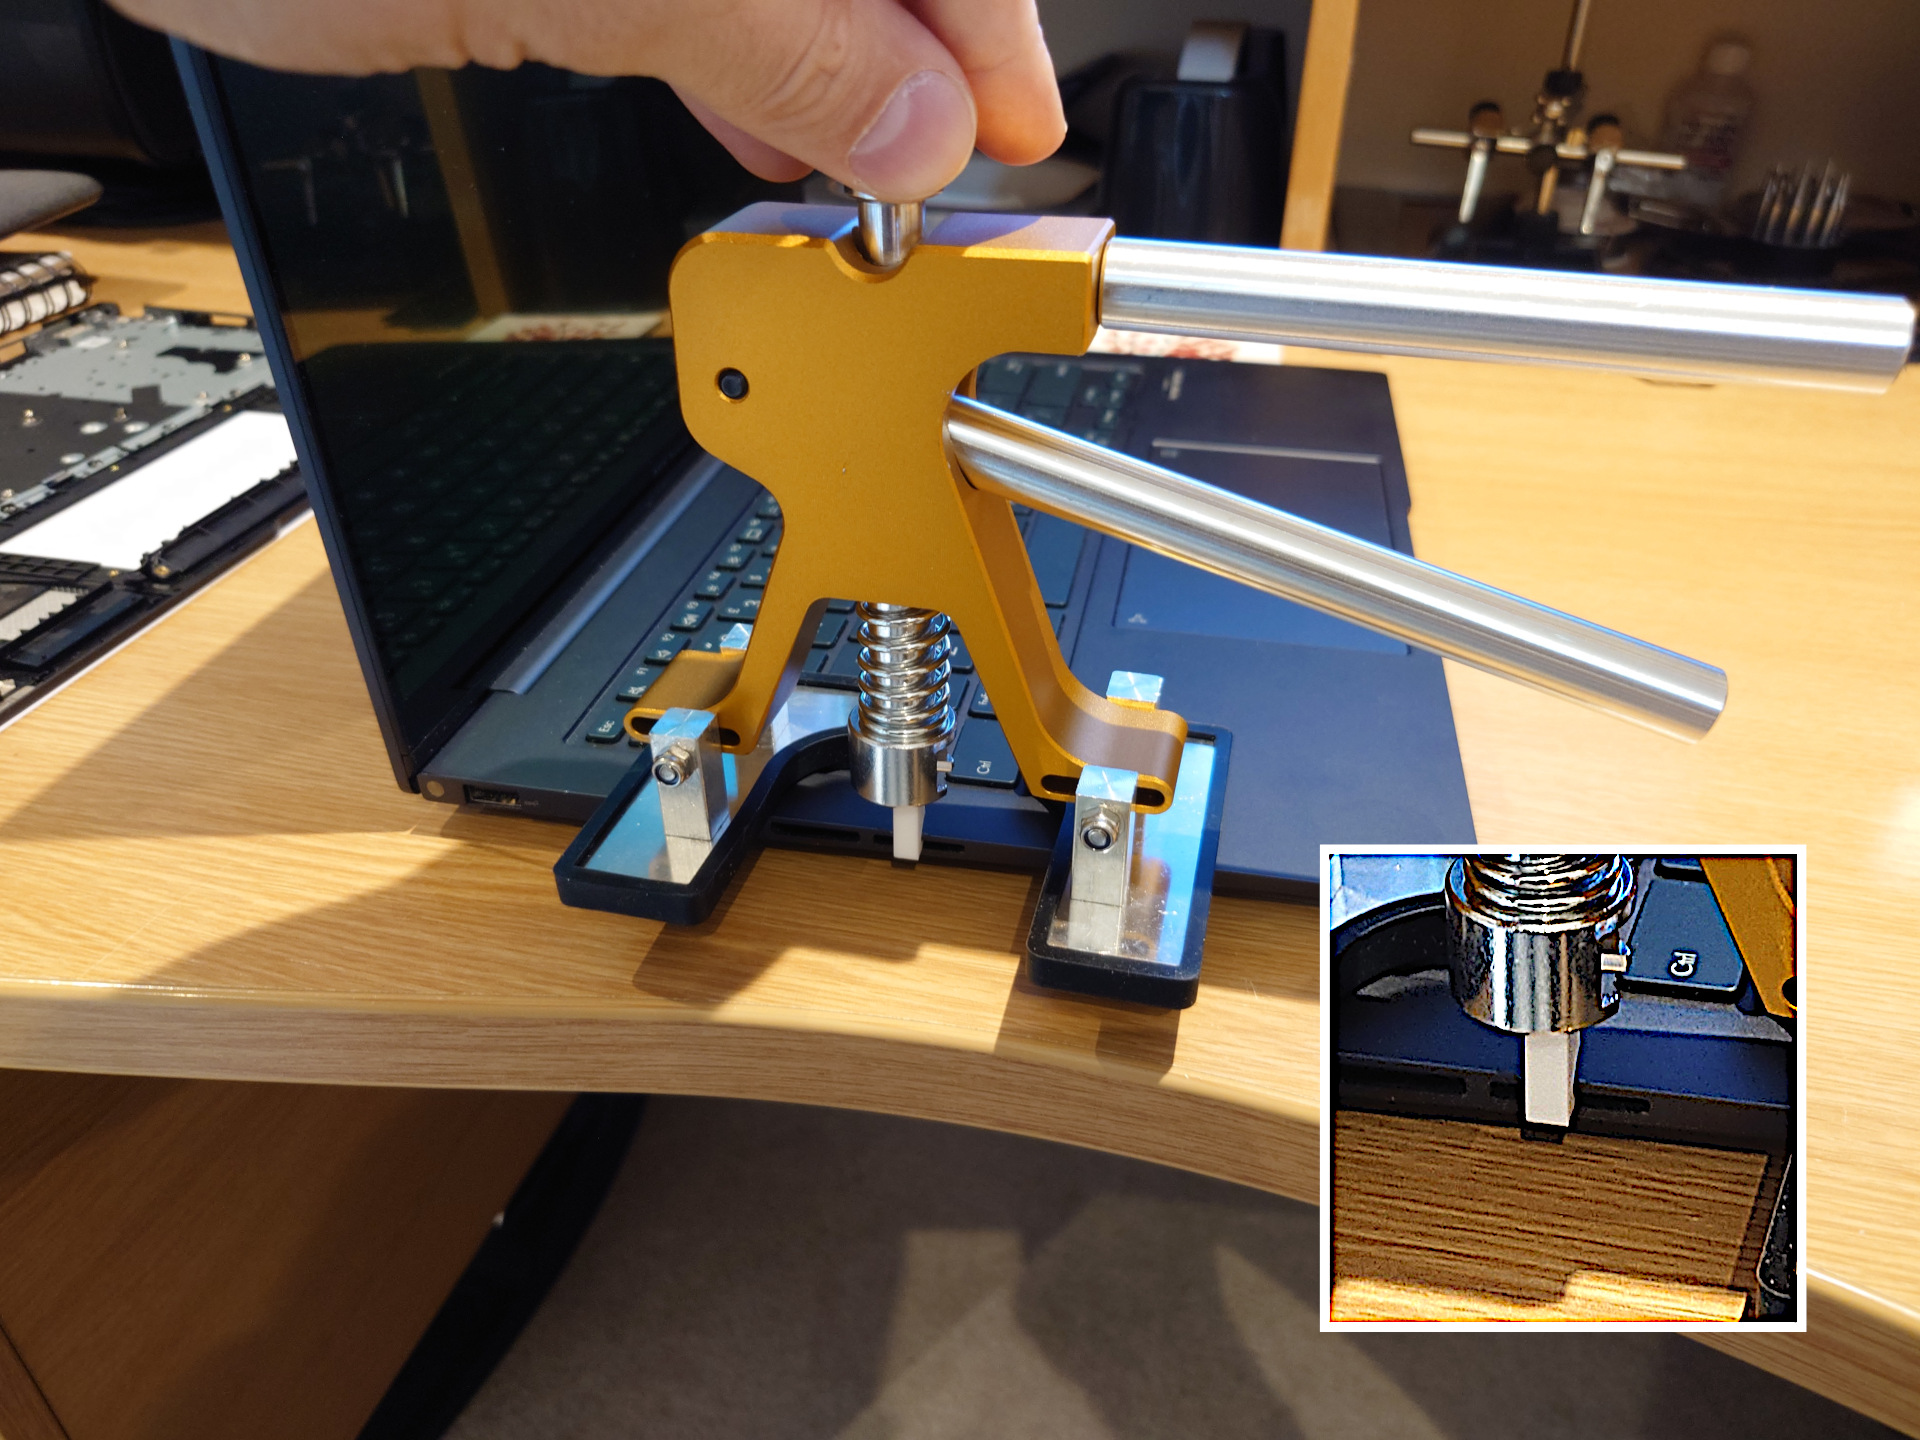
And now my laptop keyboard is straight(ish). Woohoo!